
Use this guide when installing Zhaga casDMX or Zhaga DMXcas in a luminaire housing or junction box. Both use a four-contact Z10 Key A receptacle for Class 2 power and a complete, non-isolated DMX interface.
Choose the correct signal direction
- Zhaga casDMX receives Casambi commands wirelessly and sends DMX to a fixture or driver.
- Zhaga DMXcas receives DMX from an external master or console and publishes levels into the Casambi network.
The socket pin assignments are shared. The product determines whether the DMX pair is an input or an output.
Four contacts carry power and DMX
| Pin | Connection | Installation requirement |
|---|---|---|
| 1 | +12–24 VDC | Class 2 constant-voltage supply, maximum 100 VA. |
| 2 | DC return / 0 V / DMX common | Connect both the controller supply return and the DMX common/reference. |
| 3 | DMX+ | Data positive to the fixture for casDMX, or from the master for DMXcas. |
| 4 | DMX− | Data negative to the fixture for casDMX, or from the master for DMXcas. |
DMX common is required. DMX+ and DMX− alone do not provide the complete connection. This interface shares its DMX reference with DC return on pin 2.
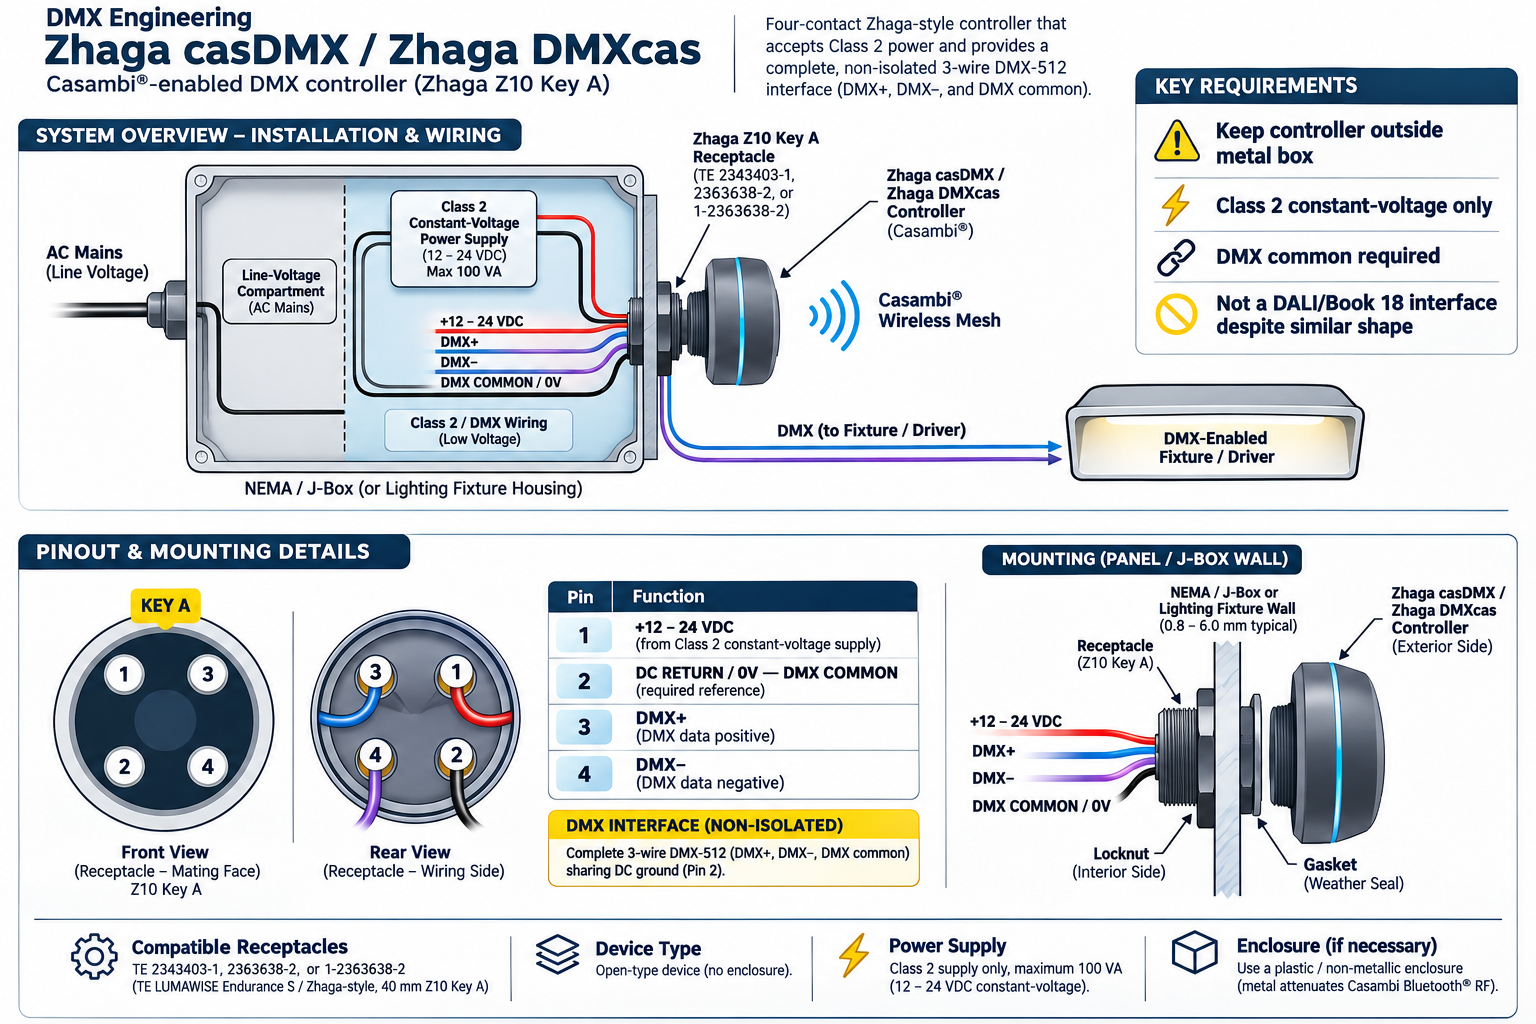
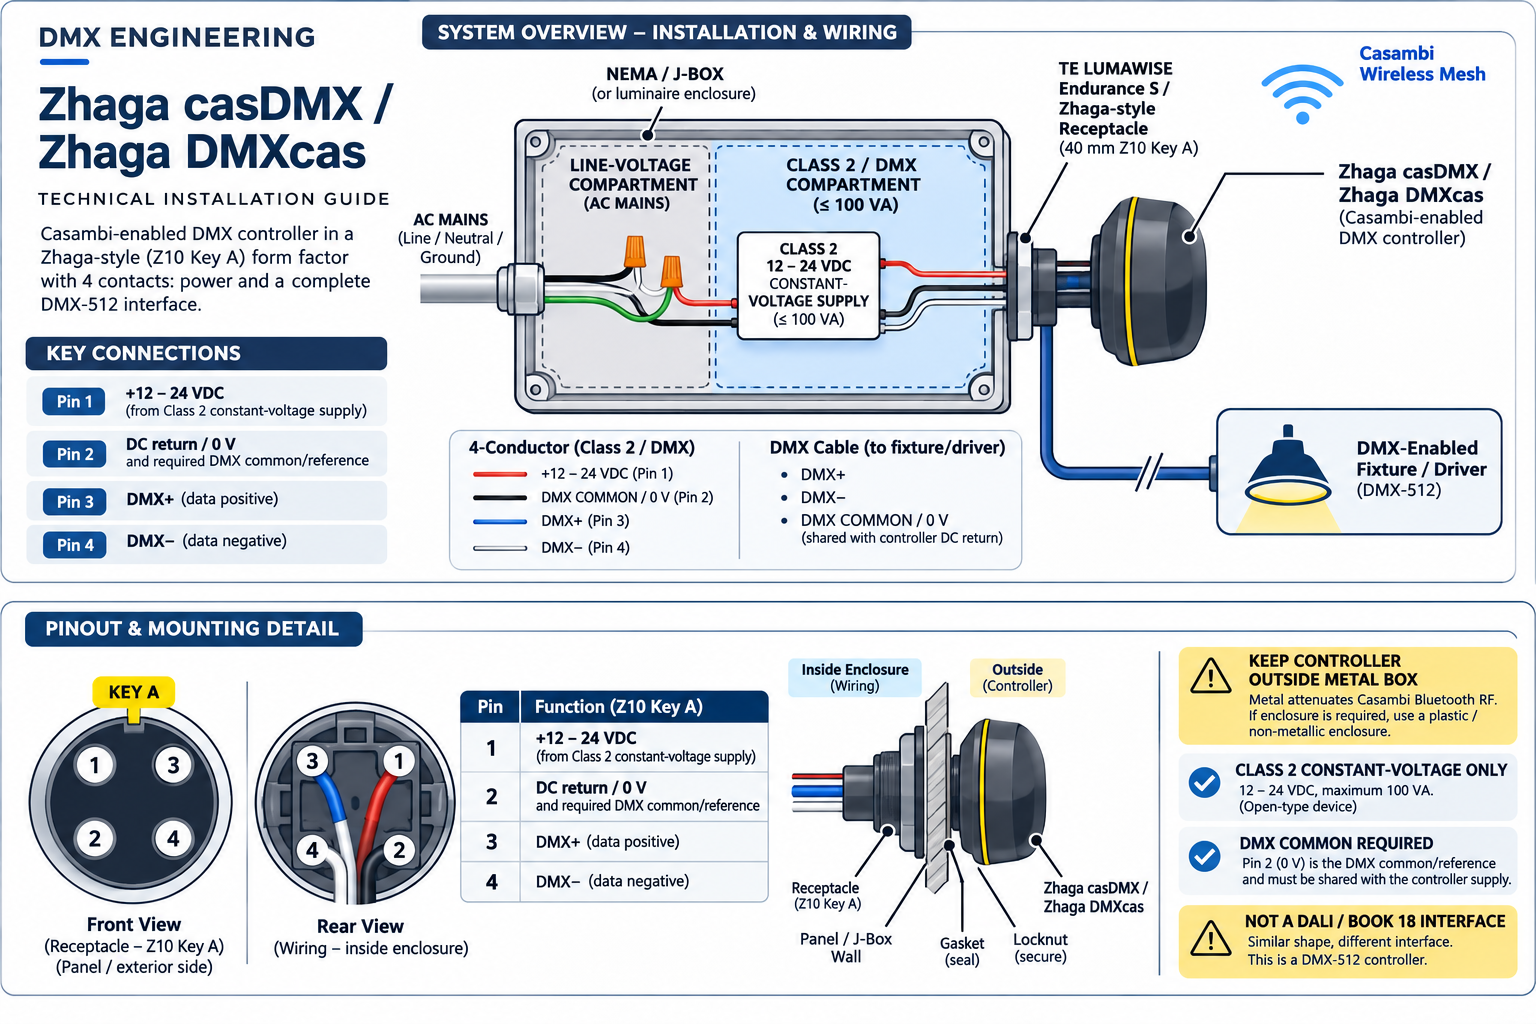
With Key A at the top, the receptacle's front mating face has pins 1 and 3 across the top and pins 2 and 4 below. The rear wiring view is mirrored, with pins 3 and 1 across the top and pins 4 and 2 below. Confirm the viewing side before terminating wires.
Mount the controller outside the metal enclosure
Keep the power supply and field wiring inside the housing. Mount the receptacle through the enclosure wall and keep the controller's radio outside the metalwork. Metal surrounding the controller can attenuate Casambi Bluetooth communication.
- Select the correct receptacle. The installation sheets identify TE LUMAWISE Endurance S / Z10 Key A receptacles 2343403-1, 2363638-2, or 1-2363638-2. Verify the selected part's current manufacturer instructions, panel compatibility, and sealing arrangement.
- Secure the receptacle. The mounting illustration places the locknut on the interior side and the gasket on the exterior side. Seat the seal and tighten the assembly according to the receptacle manufacturer's instructions.
- Separate AC mains from Class 2 / DMX wiring. Follow the supply, enclosure, and luminaire installation requirements for the line-voltage and low-voltage compartments.
- Connect the four socket wires. Use the pin assignments above. Use a constant-voltage Class 2 supply and retain a continuous DMX common.
- Fit the controller on the outside. If an additional enclosure is needed, use a suitable non-metallic enclosure that allows radio communication.
Verify the electrical interface. These products use DMX Engineering's DMX pin assignment. The similar physical form does not make the controller a DALI / D4i / Book 18 electrical interface.
Original installation and mounting sheets
Select either image to open the complete original PNG at full resolution. These combined sheets illustrate a DMX fixture connection. For Zhaga DMXcas, connect the external DMX master to the same data and common pins using the input direction described above.
Check the installation before commissioning
- Verify supply voltage and polarity at pins 1 and 2.
- Verify DMX common continuity between the master, controller, and applicable receiving equipment.
- Check pins 3 and 4 against the correct front or rear view.
- Use DMX-rated cable and a continuous bus. Use an active splitter for branches.
- Terminate DMX+ to DMX− at the final receiver as required by the DMX equipment. Zhaga casDMX is the transmitter. Zhaga DMXcas is a receiver.
- Check the gasket, receptacle retention, and enclosure seal before exposure to weather.
- Verify Casambi discovery and communication with the controller in its installed position.
Product guides
Zhaga casDMX installation overview · Zhaga casDMX installation manual
Zhaga DMXcas installation overview · Zhaga DMXcas installation manual